75 Replies
452 Views
0 Likes
9 Participants
Last post by Ebonyswanne 9 Jan 2008 00:25
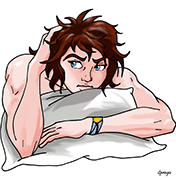
Springie
Her Royal Fluffiness...Swan of Swans...
posted 30 Dec 2007 10:51
(edited 30 Dec 2007 10:56)
Yes, I finally got it...I have LOTS to learn, but I thought I'd show you my first (unfinished) attempt. I started with a simple pic to see if I can get the hang of it. It took me forever to color...but I'm happy so far!

Springie
Her Royal Fluffiness...Swan of Swans...
posted 30 Dec 2007 12:08
(edited 30 Dec 2007 12:11)


Ebonyswanne
Gatchamaniac
posted 30 Dec 2007 13:08
They look great Springie!
I know what you mean about getting the colours right. I'm still figuring out the layers and getting the outlines done so it doesn't look like a 2yr old ran loose with the picture!
Thanks to Katsesama, I'm learning lots of neat tricks!!! 

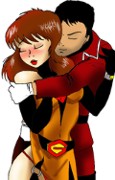
Wow.
Springie!
Now I'm excited!!!! We thought you rocked before. I'm on the edge of my seat waiting to see what you do now!! You'r first attempts were awesome!!
SJ
Thanks baybee! I have a lot to learn, but i am having so much fun! I would love to stay up all night long and play...but I think my brain is mush after today's lessons...I'll be ready for more tomorrow!!! 

Originally posted by Ebonyswanne They look great Springie! I know what you mean about getting the colours right. I'm still figuring out the layers and getting the outlines done so it doesn't look like a 2yr old ran loose with the picture!Hahaha... thanks, Ebony! I'm right there with ya, baybee...this is much more tedious than I expected...I think I thought Photoshop would magically produce great things...now I see it's a lot more work than coloring by hand. But it's sooooo much more satisfying!

Geez, Springie, maybe I'll download Photoshop later! The thing you can do with it look great !
Nice work, Springie. I see you learnt how to use the Dodge and Burn tools. Take your time and experiment with the various tools and settings. Remember 'Control-Alt-Z' (undo) is your friend. 
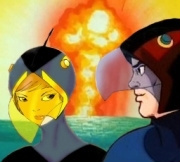
Thats a great first attempt at photoshop Springie.... so can't wait to see more pics from you!
Thanks, GG! Here's my latest...

Ebonyswanne
Gatchamaniac
posted 31 Dec 2007 21:20
Maybe we should have a thread for tips from you guys in getting effects. I'm don't have much time at the moment to sit and play, and when I do the layers are just not working the way I want them too. my outlines are crappy. But one day when I get a decent pic I post it.
SJ_SwanJun
Forum Goddess
posted 1 Jan 2008 09:06
Ahhh I can't add in any tips for I am but a lowly Corel user...
I want to know, Springie - do you use a tablet and pen, or just your standard mouse for these pictures?
Or are the traced in the program to turn it into vector images?
SJ
I scanned in my sketch, and then did the color by zooming in and filling it in...then i had to go back and retrace the black outlines that I lost (using my mouse). I'm sure there is an easier way....i just don't know it yet. This one took me quite a while to finish.
I would love to get one of those tablets...what is it called? Wacom? That would make things so much easier I'll bet.
Ok, I'm going to sound stupid here...but what is a vector image? 

Ahhh I can't add in any tips for I am but a lowly Corel user...What? Lowly Corel user? Oh baby...the things you can do with Corel make my heart pitter patter...so how about gracing us with more of your beautiful pics, huh? And you need to make yourself a gallery on Gatch Archives, too...
SJ_SwanJun
Forum Goddess
posted 1 Jan 2008 11:00
Originally posted by Springie I scanned in my sketch, and then did the color by zooming in and filling it in...then i had to go back and retrace the black outlines that I lost (using my mouse). I'm sure there is an easier way....i just don't know it yet. This one took me quite a while to finish. I would love to get one of those tablets...what is it called? Wacom? That would make things so much easier I'll bet. Ok, I'm going to sound stupid here...but what is a vector image?Okay a vector image is an image made up of individual objects instead of pixels (a bitmap is based on pixels). The objects are defined by mathematical equations. You can adjust the size of a vector image and the image remains clear and of high quality. I scan my drawings, then trace using the CORELtrace program. This reads the black outline and turns it into shapes which can then be manipulated and resized without problem. After I use my fills and what-not for base colours, I convert to a bitmap to airbrush and fun stuff. I have a Wacom tablet, but I took it to work, so I don't have it to play at home. It takes a while to get used to, and you have to rely heavily on hand-eye coordination ... but once you have the hang of it, the damn thing rocks!! I am in need of a new one, I've had mine for seven years now ... As for me doing more artwork? Ahh, hon. I'm so out of shape with art that I really don't know if I can give you guys anything nice ... We'll see. I tried to create an account at the gatch archives, but am having no end of trouble with it. I am finding it a hassle to navigate, can't access the gallery, and ... gah! If it takes this much work, I'm really not all that interested. I have never really been welcomed with open arms within that circle, anyhow. Being kicked off the Yahoo list for not playing slathering and obediant fool to the coven of four (this is going back some time) and being mercilessly chided for every post I ever posted has made me leery to play and share in that playground. I don't like being told I can't write for shit, so I lost interest in sharing with anyone outside da house and this site. But, if the urge and muse strikes, you know I'll share with you guys. I am much more content, however, to see your stuff. I love watching your growth, excitement and passion with this. I am inspired and awed by you. I mean it! SJAhhh I can't add in any tips for I am but a lowly Corel user...What? Lowly Corel user? Oh baby...the things you can do with Corel make my heart pitter patter...so how about gracing us with more of your beautiful pics, huh? And you need to make yourself a gallery on Gatch Archives, too...
SJ_SwanJun
Forum Goddess
posted 1 Jan 2008 11:06
Double post, I know ....
Springie.
Send me a black and white image of yours, and I'll throw it in Corel and show you how the trace program works.
You'll notice a big difference ...
I'll chat with my Graphic Designer at work and see how she suggests trying that route on Photoshop. It's really quick and really fun ... And, oh, can you have some fun playing with different fills and shit.
I love vectors much more than bitmaps....
SJ
I have one of those tablets - never use it. Maybe one of these days.  Here's what I recommend once you have the original image open...
1) Create a new layer. We'll use this soon but leave it blank for now.
2) Click on the original layer. The easiest (but not always the quickest) way to select the area you want to colour is with the Magic Wand Tool.
Notice the Tolerance value for the Magic Wand Tool - the higher the number, the more area the tool will select. I often use this tool with a Tolerance of 15 - 25 but it varies depending on the image and what I want to select.
The Magic Wand Tool also has 4 selections (any selection tool has these): New, Add, Subtract and Intersect. I'll cover the first three since they are what I use the most.
New Selection means that everytime you use the Magic Wand Tool, the area selected will be a new area with each click of the mouse. Add means that everytime you select an area with the mouse, the areas will add together forming a wider selection. Subtract takes away from an area that has already been selected.
For example, if you selected an area that covered a part of the picture you don't want selected - I would pick the Polygonal Lasso Tool (with the Subtract selection) to remove the excess area.
3) Okay, once you have the area selected you want to colour - click on the new layer that you created at the start. Paint on this layer and not on the original picture/layer. Right click on this layer and select Blending Options. Where it says Blend Mode - select Multiply. This allows the dark lines from the layer under this one to bleed through. This should remove the need to retrace any lines.
For each different parts of the picture can be done on their own layers or all on one - it is up to you. Some images (ie GIFS) won't allow you to create layers but there is a way around that - I'll save that trick for another day.
4) Save the file as a PSD photoshop file to preserve the layer information. When you want a JPG for the web, do a 'Save for Web' and not 'Save As'. This will reduce the image to web resolution and make the file size a lot smaller. 'Save As' is used if you want a good quality JPG for printing or something.
I hope this makes sense and is of some help. Feel free to ask any questions.
Here's what I recommend once you have the original image open...
1) Create a new layer. We'll use this soon but leave it blank for now.
2) Click on the original layer. The easiest (but not always the quickest) way to select the area you want to colour is with the Magic Wand Tool.
Notice the Tolerance value for the Magic Wand Tool - the higher the number, the more area the tool will select. I often use this tool with a Tolerance of 15 - 25 but it varies depending on the image and what I want to select.
The Magic Wand Tool also has 4 selections (any selection tool has these): New, Add, Subtract and Intersect. I'll cover the first three since they are what I use the most.
New Selection means that everytime you use the Magic Wand Tool, the area selected will be a new area with each click of the mouse. Add means that everytime you select an area with the mouse, the areas will add together forming a wider selection. Subtract takes away from an area that has already been selected.
For example, if you selected an area that covered a part of the picture you don't want selected - I would pick the Polygonal Lasso Tool (with the Subtract selection) to remove the excess area.
3) Okay, once you have the area selected you want to colour - click on the new layer that you created at the start. Paint on this layer and not on the original picture/layer. Right click on this layer and select Blending Options. Where it says Blend Mode - select Multiply. This allows the dark lines from the layer under this one to bleed through. This should remove the need to retrace any lines.
For each different parts of the picture can be done on their own layers or all on one - it is up to you. Some images (ie GIFS) won't allow you to create layers but there is a way around that - I'll save that trick for another day.
4) Save the file as a PSD photoshop file to preserve the layer information. When you want a JPG for the web, do a 'Save for Web' and not 'Save As'. This will reduce the image to web resolution and make the file size a lot smaller. 'Save As' is used if you want a good quality JPG for printing or something.
I hope this makes sense and is of some help. Feel free to ask any questions.
 Thanks for the advice, guys...I can see there is much more to learn...and I will try some of these things out with my next piccie...I knew there had to be a better way...
Here's my next try...

Thats a great piccie springie! A good one to start the new year off with!
OK I put the what you guys have done so far into the Jumble folder...
Maybe I should ask CEP to a shelf for this stuff so that people can find it and add tips and information the find to it...
Ok let me tell you my idea...I want to take a screenshot of a Gaatch back ground and use it for the background in one of my pics...is there an easy way (or a way at all) to do that?

I could tell you how to do it in three steps in Corel ... Sorry, wish I could help with Photoshop... If noone gives any ideas, I'll check with my guru at the office.
Phew. Reading Sosai's tutorial gave me a blink and a half. Photoshop looks so complicated
I suppose they're right when they say you're either Corel or Photoshop.
I am Corel through and through ... it appears much more user friendly - but I must concede that Photoshop is a more powerful tool for the professional....
SJ
Here is a good site with some Photoshop tips:
101 Hidden Tips & Secrets For Photoshop
Originally posted by SJ_SwanJun Phew. Reading Sosai's tutorial gave me a blink and a half. Photoshop looks so complicatedLOL! It probably has more to do with my explanation than anything else. It is true that Photoshop does have a learning curve like any software. The thing about Photoshop is it looks more intimidating than it really is - at least IMNSHO. The nice thing about photoshop is there are often several ways of getting the same results. Everyone has their favourite way of doing things. Once you've mastered a few tricks, then you can produce some really nice work.
Originally posted by Springie Ok let me tell you my idea...I want to take a screenshot of a Gaatch back ground and use it for the background in one of my pics...is there an easy way (or a way at all) to do that?I do that sort of thing all the time. To do that you need to work in layers. Parts of the overall picture would be on different layers thus producing the effect you are after (ie the background image would be on the bottom while your image would be on the layer above that). Here is an example of the use of layers:
 The small box to the right shows the various layers. The layer on the bottom is the explosion background. Then you have the pikachumecha and the text with another part of the explosion on the top layer so if superimposes over the rest of the image.
If you want to see an example, you can download the PSD Photoshop file HERE.
A couple of pointers:
1) The Background layer is often locked which means you can't do much with it. To unlock it, just doubleclick on the layer (in the layer box).
2) You can move layers up and down (as you see fit) by clicking on them (again, in the layer box) and drag them up and down.
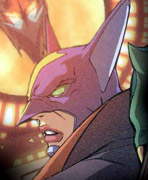
You need to double-click the BACKGROUND (bottomost) layer of YOUR art and change the name from BACKGROUND (which is locked and therefore won't let you put anything behind it) to LAYER 0 (or whatever it names it by default -- you won't have to actually type anything, just click OK).
Then open the Gatch image and grab its thumbnail in the LAYERS palette. Drag and drop that onto the picture you've created (just onto the image itself, and drop it). Then drag the Gatch background to the bottom, so it's beneath LAYER 0 on your art. (If you try to do this without unlocking the background and changing it to LAYER 0, you'll be ripping your hair out, so that's important!)
Now, the background will probably be completely covered by the white of your paper, so you need to get rid of that. There are a variety of ways to cut things out, and you're going to have to forgive me for referencing myself, but it's easier to send you to a full visual tutorial than to try to re-explain here.
Cutting Out the Pieces  Let me know if any of that doesn't make sense!
Originally posted by katsesama Cutting Out the PiecesGreat link, Katsesama! When it comes to dealing with editing images, I use the polygonal lasso tool all the time. I rarely use the magic wand tool unless I'm dealing with sections of one solid colour. This is for Springie (or anyone who hasn't learnt this useful tool yet - I couldn't live without it in Photoshop): Another great tool in photoshop is Edit -->Transform/Free Transform. Say you inserted your image (on its own layer) over the Gatchaman Background Layer and you want to make your image a bit larger to fit the background better... then use the Transform/Free Transform Tool. With this tool, you can resize, rotate, flip, change scale, etc without distorting the image.
Ebonyswanne
Gatchamaniac
posted 2 Jan 2008 02:42
My husband has been doing "skins" for his race car in one of the games he plays. He showed me the picture of the gangster girl he did for the side of the car...it looks like the G-2 in the way Joe would do it if had free rain. I even got a fic idea from it to run past TJ at the weekend.
I have booked marked all of the tips sites...give me 2 weeks and I'll do a piccie...just promise you won't laugh to hard at my attempts to use the program. I became a mother just when I was starting get into learning it and I haven't touched it in 2 months...
clouddancer
Gatchamaniac
posted 2 Jan 2008 14:13
Aww, Ebony. We would neve laugh too hard at you.
(Maybe a snicker or two, but never a full out laugh.)
You know I am just kidding.
I know exactly how you feel about showing such a personal side.
So I would never laugh at you Ebony.
I admire (sit in awe of) everyones artistic talents it takes so much courage to let yourself be exposed like that.
*Cloud now wonders where she found the courage to post her stuff*
Great advice! I was able to mask everything out...now on to the fun stuff... 
I remember when I first got photoshop. I had no idea what I was doing and gave up in disgust. I ended up using a program that came with my scanner called Photosuite instead because it had a more user-friendly interface. Eventually (maybe after about a year) I realized that the program just couldn't do half of the stuff I wanted to and I ended up giving photoshop another try - I haven't looked back since.
I guess the moral of my story is... don't get discouraged by Photoshop's user interface. Stick with it and you'll be surprised how useful the tool can be. 
Originally posted by Springie Great advice! I was able to mask everything out...but i couldn't get the background to drop into the picture...you said to drag and drop the thumbnail in... but it wouldn't go...any ideas?Copy and paste it in. Control-A will select all of the image that you want to move. Control-C to copy. Then click on the bottom layer on the new image and Control-V to paste it in. Course that is assuming you are using a PC and not a Mac. I don't know if the keyboard commands are the same. You can also use the Photoshop commands: Select --> All on the image you want to copy. Edit --> Copy. Then in the new image, Edit --> Paste.
Thanks, Tim! I finally got it figured out, I think...at least until I get stuck again...lol
clouddancer
Gatchamaniac
posted 2 Jan 2008 18:06
Originally posted by Sosai XCloud puts up hand to stop instruction for a moment: So are you saying, there may be a Mac version available for me somewhere.Originally posted by Springie Great advice! I was able to mask everything out...but i couldn't get the background to drop into the picture...you said to drag and drop the thumbnail in... but it wouldn't go...any ideas?Copy and paste it in. Control-A will select all of the image that you want to move. Control-C to copy. Then click on the bottom layer on the new image and Control-V to paste it in. Course that is assuming you are using a PC and not a Mac. I don't know if the keyboard commands are the same. You can also use the Photoshop commands: Select --> All on the image you want to copy. Edit --> Copy. Then in the new image, Edit --> Paste.
clouddancer
Gatchamaniac
posted 2 Jan 2008 18:46
I think I answered my question when I did a search on Apple.com.
Yes there is a version of Photoshop for intel core Macs.
Originally posted by Springie Thanks, Tim! I finally got it figured out, I think...at least until I get stuck again...lolIf one image is a GIF and one is a jpg, you can't drag and drop. It has to do with the kind of color processing (RGB vs CMYK) used in the image. If you need to, you can always go into IMAGE >> MODE and change both of the images to RGB. Or you can just cut and paste, like Tim says!! Obey Sosai!

Originally posted by clouddancerOf course! There was a time when Macs were graphic designers' machines and if you wanted to use Photoshop you had to have a Mac! I did when I was a graphic designer.Originally posted by Sosai XCloud puts up hand to stop instruction for a moment: So are you saying, there may be a Mac version available for me somewhere.Originally posted by Springie Great advice! I was able to mask everything out...but i couldn't get the background to drop into the picture...you said to drag and drop the thumbnail in... but it wouldn't go...any ideas?Copy and paste it in. Control-A will select all of the image that you want to move. Control-C to copy. Then click on the bottom layer on the new image and Control-V to paste it in. Course that is assuming you are using a PC and not a Mac. I don't know if the keyboard commands are the same. You can also use the Photoshop commands: Select --> All on the image you want to copy. Edit --> Copy. Then in the new image, Edit --> Paste.

Well I knew Macs were great for graphic designers and all that fancy stuff, which is why they are always shown in the movies and on TV. That is all the designers on the sets use and when a computer is called for they "Plop" one of their own computers down  But me, a computer incompetent, thought Photoshop was exclusively a PC based program, much like many other programs people mention I should use are.
Originally posted by katsesama If one image is a GIF and one is a jpg, you can't drag and drop. It has to do with the kind of color processing (RGB vs CMYK) used in the image. If you need to, you can always go into IMAGE >> MODE and change both of the images to RGB. Or you can just cut and paste, like Tim says!! Obey Sosai!LOL! For the longest time, that's how I dealt with gifs... copy & paste. It wasn't until the last six months or so that I realized all you had to do was adjust the colour range and voila - you can add layers to a gif. Even to this day, I'm still learning new things about Photoshop. *grin*
Ebonyswanne
Gatchamaniac
posted 3 Jan 2008 04:45
I'm trying to cut and paste into a file all of these ideas on using the program...keep it coming guys
Ok, I've got the hang of some of the things you guys told me about , but not all of it...this one didn't turn out so well, but I got tired of messing with it...may work on it more later...
That background is the upstairs of the Snack J...

That's not that bad. You'll get better at it as you do more images.
One thing you'll want to think about is shadows... you'll want the shadows on the characters to match the shadows of the background. That way it looks like the light is coming from one source. At this point, it looks like Joe has been doing a lot of sweating.
On a side note... How did you do your borders, Springie?
On a side note... How did you do your borders, Springie?
hahaha....sweating...i didn't think about that...I was thinking in the Snack, the lights come from above...so i was trying to make the light hit the top of his shirt...lol
anyhow...the border comes from that free site...I still use it for final touches...I think it's bc I'm so comfortable with it...can't help myself! 
Oh, I think you did a wonderful job! What don't you like about it, Springie? If you can be more specific, I might be able to comment on how to change what you're not completely happy with.
And I like a sweaty Joe. Woo-woo!! 
Originally posted by Ebonyswanne I'm trying to cut and paste into a file all of these ideas on using the program...keep it coming guysI was thinking about doing the same thing for a tut on DA. I'm just not as organized as you -- you're awesome! Maybe after you have a good-sized collection of tips you could forward it to me and I could add some images to illustrate and put it on DA? It could be a tut collab, as I think Tim is on DA too!
Originally posted by katsesama I was thinking about doing the same thing for a tut on DA. I'm just not as organized as you -- you're awesome! Maybe after you have a good-sized collection of tips you could forward it to me and I could add some images to illustrate and put it on DA? It could be a tut collab, as I know Tim is on DA too!Pardon my ignorance but what is DA? Oh, I get it now... the Deviant Art website. Actually I'm not on it. But if any of my tips here are useful, feel free to use them.
Speaking of tips... here's what I do to create quick & easy borders on my images (as seen on most of my recent screen caps). Actually this is one way of doing it. I also know of an another way (I'll share that later).
1) Click on your bottom layer (usually the one with the background) to activate it. You might have to double-click it to unlock it. This won't work if the layer is locked. Actually this should work on any layer come to think of it. I just happen to use the bottom layer out of habit.
2) On the top menu bar, click on Layer --> Layer Style --> Stroke. A box will pop up. Adjust the setting as such:
Position: Inside (warning - this will cover a part of your image)
Size (in pixels): The larger the number the thicker the border. That's pretty straight forward.
Colour: Click on the box and select the colour you wish to use. Click on the colour box (to the left) to select your colour. Use the scale to move up and down the colour spectrum.
Personally, I use the hexadecimal colour system (ie black = #000000, white = #ffffff, red = #0000ff, etc) usually but that's because it is used in web design. The colours and their codes can be found here:
http://www.computerhope.com/htmcolor.htm
That's all there is to it. Play around with the settings to get the affect that you want. You can always cancel or Undo (CONTROL-ALT-Z) something that doesn't work and try again.
EDIT: I should mention that this is the same method I use to put the outlines around my text. The only difference is the outline isn't usually as thick as the border and it is on the outside (not the inside) but that will depend on a case by case scenario.
One more thing (heh heh, I feel like Uncle from the Jackie Chan Adventures cartoon *grin*), The Fill Type is set for colour. You can also play with the other settings (gradient and pattern) to see what interesting effects you can come up with.
Originally posted by Springie hahaha....sweating...i didn't think about that...I was thinking in the Snack, the lights come from above...so i was trying to make the light hit the top of his shirt...lol anyhow...the border comes from that free site...I still use it for final touches...I think it's bc I'm so comfortable with it...can't help myself!For the record I think you did a great job.
 I was trying to offer some constructive criticism, but I realized my previous post might not sound as supportive as I meant it.
Once you get used to photoshop, you'll only be using that free site to make animated images.
Ebonyswanne
Gatchamaniac
posted 3 Jan 2008 21:17
I'll clean up the paste into word and then I'll forward them onto you Katsesama...
Ebonyswanne
Gatchamaniac
posted 3 Jan 2008 21:25
You guys rock big time...I have 11 pages of tips so far from this thread...way to go!
Okay here is my other way of creating borders on my images. I'll call this Image Borders Take 2...
Open the image you want to add the border to.
1) Create a new layer. Move this layer under your image. To do this, you will have to unlock the image layer first.
2) Once the new layer is underneath the image layer, click on Image --> Canvas Size. A box will pop up with the image's current size and a weird 9 square box with arrows underneath it. This option will change the overall size of your image without affecting the actual image itself. Generally I work in pixels but you can change the measurement to suit your needs.
3) Select the size of your border and add that to both your image's height & width. For example, say an image has a width of 720 pixels and a height of 576 pixels and I want a border that is 10m pixels thick then I would change the numbers to 730 & 586. Leave the funny boxes alone (for now) and click okay.
4) What will happen is you'll have additional space around your image (if it is transparent then it should have that checkered pattern). Here's why you wanted this layer at the bottom - pick your desired colour for the border and fill the new layer with it with the paint bucket. Voila - you now have a coloured border around your image.
Okay... about the small boxes with the arrows. That tells photoshop where to place your original image as it adds new canvas space. For example, if you clicked on the top left box, it will place your image at the top left corner and add any new space to the right and bottom of the image.
One more thing... You can use this method to add more canvas space to your image and then use the Layer --> Layer Style --> Stroke option on the original image (but with the border on outside instead of inside) to get a border plus additional space around it.
I hope this makes sense. I prefer the Stroke method but both methods have their uses.
Ebonyswanne
Gatchamaniac
posted 3 Jan 2008 22:36
What I'll eventually do is put the tips into a file in the library for everyone to download if they need some info on doing these things...I hope you all don't mind if I do that.
I may do a few files as time goes on, just for updates and new discoveries with Photoshop.
Originally posted by Ebonyswanne I'll clean up the paste into word and then I'll forward them onto you Katsesama...Cool, thanks!
 Hm, I thought one of the people who posted on Springie's stuff was named Tim. Maybe you SHOULD be on DA, Tim!

Originally posted by katsesama Cool, thanks!LOL! Springie has told me the same thing. Course I don't draw much these days. I still have some of my old art from high school but nothing recent (except the maps that I draw for my RPG games). I try to spend my time writing these days but I usually end up editing other people's work instead. On a personal note - I am trying to write more these days but alas, I have no plans for Gatchaman related fanfic. At least not at this point. I'm already over extended with my other writing priorities.
We'll be waiting, Tim!! We'd love to see some of your stuff!
Here's my latest. I really tried to take in all of your good advice, but I must be a slow learner...lol
Katse, your walk through helped alot! (except, I forgot how to mask) *grin*
Hey, I'm just happy to be playing with my new toys!

clouddancer
Gatchamaniac
posted 4 Jan 2008 20:15
Sorry to criticise Springie,
But to me Jun's eye are just a little too intensely green.
Can they be toned down?
Otherwise, I love the effects you are getting, and how quickly you are learning.
Thanks, CD...I think I know what happened...the colors changed a bit when I multiplied the colors...
I just noticed that Ken's hair shading is off, too...I'll see what can do to fix it...
Ok, I think it's fixed now...
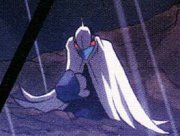
Yes, you do!! I'd love to see what you'd come up with...
waitaminute...I'm scared though...I think you might draw some Eagle bashing pics!
waitaminute...I'm scared though...I think you might draw some Eagle bashing pics!
clouddancer
Gatchamaniac
posted 4 Jan 2008 20:50
Now Jun has brown eyes. I guess we can blame it on the visor.
I noticed on the video's I've been watching today that their eye colour changes depending on the angle of the visor. Sometimes Mark's eyes are Blue, sometimes Black. I guess it depended on what colour ink the artists had at the time.
It's dark green, but I think you're right...the visor tint changes it quite a bit... I notice her eyes look brown under the visor on the show sometimes too...
I guess I better rip it off the net. Right now I'm loading the full series of The Full Metal Alchemist.....Subbed. 51 Episodes. 8.95 Gigs.....
Full metal definately takes the number 2 spot under Gatch on my anime list.... I've known and loved Gatch too long for anything to replace it.....
clouddancer
Gatchamaniac
posted 4 Jan 2008 21:26
Originally posted by Toneman I guess I better rip it off the net. Right now I'm loading the full series of The Full Metal Alchemist.....Subbed. 51 Episodes. 8.95 Gigs..... Full metal definately takes the number 2 spot under Gatch on my anime list.... I've known and loved Gatch too long for anything to replace it.....And where are you finding these episodes? Actually it is Gundam Seed I am looking for. But I have watched Full Metal myself.
I have a bit torrent program called Azereus that I use. My favorite bittorrent site is (seriously!!!!)
www.isohunt.com
No joke. I died when I saw it. How appropriate for a Gatch fan. BTW, There aren't any Gatch eps for download.... I already looked. 
clouddancer
Gatchamaniac
posted 5 Jan 2008 07:23
Ahh, yes Amy mentioned something about torrents a few months back.
And that should could find very little Gatch on there (over there)
Me, just starting to understand the whole internet thing, and still am, was not sure what torrents were so left the site/topic alone. (See I am still unsure what torrents are/is.)
maybe I should do as Tim suggests, "When you are not sure of something do a google search" on the topic.
Originally posted by Toneman I have a bit torrent program called Azereus that I use. My favorite bittorrent site is (seriously!!!!) www.isohunt.com No joke. I died when I saw it. How appropriate for a Gatch fan. BTW, There aren't any Gatch eps for download.... I already looked.Tone, if you ever stumble over some Gatch Fighter eps just tell me! I'm willing to do everything for them!
OK...This is the only thing that I have started in Photoshop...but I think I will put some time into finishing it now. I just did a "poster outline" finish...or watermarked...Now I'm going to do one with the colour layers if I can get it to work for me. The poster out line piccies I did for Photoshop experimenting.
Ebony, what version of Photoshop do you have?
 Yeah, looks like you have a good start there, Ebony! I can't wait to see one colored!

Originally posted by Toneman I have a bit torrent program called Azereus that I use. My favorite bittorrent site is (seriously!!!!) www.isohunt.com No joke. I died when I saw it. How appropriate for a Gatch fan. BTW, There aren't any Gatch eps for download.... I already looked.Ebony innocently types in the words Gatchaman... http://www.isohunt.com/torrents/?ihq=Gatchaman try this link...
Yes it is listed, but those numbers at the end of the blocks mean that there are no computers available to download the file from.
You could try it, but you won't get a full copy, or it would take weeks to download. When the numbers are high next to the name of the item you want, that means you have a good chance of getting a full copy in a reasonable amount of time.
Ebonyswanne
Gatchamaniac
posted 8 Jan 2008 02:14
Originally posted by Toneman Yes it is listed, but those numbers at the end of the blocks mean that there are no computers available to download the file from. You could try it, but you won't get a full copy, or it would take weeks to download. When the numbers are high next to the name of the item you want, that means you have a good chance of getting a full copy in a reasonable amount of time.You just have to know some computer nerds who operate off more than on system...other that my lips are tightly sealed...you never know who reads your posts *grins*
Ebonyswanne
Gatchamaniac
posted 8 Jan 2008 02:17
Photos shop question;
What is the best way to do the black outlines??? I have been cleaning up my pencil drawing so I can begin to colour it and along the way I have experimented with the outline tools that I have found...but they tend to be hard to control...
Any tips???
Originally posted by Ebonyswanne Photos shop question; What is the best way to do the black outlines??? I have been cleaning up my pencil drawing so I can begin to colour it and along the way I have experimented with the outline tools that I have found...but they tend to be hard to control... Any tips???Do you mean black outlines as in the making your drawn lines darker? If so, adjust your image's Levels, or Contrast, or Curves. All of these are available through Images --> Adjust --> what-have-you. Play around with the settings. You can always hit CONTROL-ALT-Z (undo) to negate anything you don't like. I would do these modifications before you colour your image. You can do them afterwards as well but then it will affect the colour as well.
Originally posted by Sosai XHi Ebony -- I honestly just use a softer pencil. If you are using art pencils they will have letters and numbers on the side. So a regular #2 pencil is actually a 2H. H's are harder, B's are softer. The softer the pencil, the darker the line you get without pushing. Because the pencils are softer, they also wear down more quickly, so keep a pencil sharpener handy! I normally draw with an HB or a B. I do my darker lines with a 2B or softer (3B, 4B, etc.) Art pencils are inexpensive; if you don't have some, you can buy a set from 4B to 4H, or an even wider range. I never use anything harder than a 2H, though, because it puts dents in the paper, so you could just buy HB, B, 2B, 3B, 4B to get you started. (Or even just HB, 2B, and 4B. That would be plenty, probably.) Play with them a bit to see how they mark differently. Once you scan an image in, you can still darken the lines and whiten the paper appearance. I updated my Ken With Cranes walkthrough that I did for Springie to help you out with the lines. There is explanation with pictures of how to get to the Brightness/Contrast adjustments that Tim mentioned. If you're still confused after you play around a little, post a note, ok? The walkthrough is here: http://katsesama.deviantart.com/art/Ken-with-Cranes-Walkthrough-73733424 I included a tinyurl to my masking tutorial for when you get to the mysterious part that says "mask out the stray marks." Also, Springie's brain is so full of new Photoshop info, she forgot.Originally posted by Ebonyswanne Photos shop question; What is the best way to do the black outlines??? I have been cleaning up my pencil drawing so I can begin to colour it and along the way I have experimented with the outline tools that I have found...but they tend to be hard to control... Any tips???Do you mean black outlines as in the making your drawn lines darker? If so, adjust your image's Levels, or Contrast, or Curves. All of these are available through Images --> Adjust --> what-have-you. Play around with the settings. You can always hit CONTROL-ALT-Z (undo) to negate anything you don't like. I would do these modifications before you colour your image. You can do them afterwards as well but then it will affect the colour as well.
You can also go straight to the masking tut here:
http://archetype-stock.deviantart.com/art/Advanced-Cutting-Out-Masking-68960996
Hope that helps!
Kat
Ebonyswanne
Gatchamaniac
posted 9 Jan 2008 00:25
These instructions are great! I have bookmarked the page so I refer to it. I got a bit stuck in how to colour it effectively and do the black outlines...
Well back to my piccie!!! Thanks guys for your tips!
Please login to post replies.